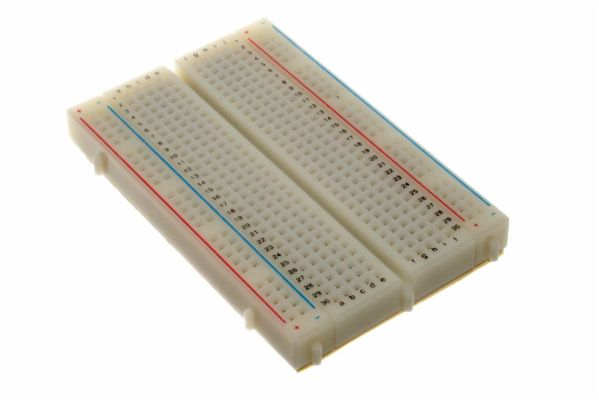
In this unit we worked with electricity and voltage. Our first step was using wires, lightbulbs, and a battery and we tried to make the bulb light up. We then did many other experiments including using multiple batteries and switches. Then we moved into breadboards that look like this.
We had wires, resisters, potentiometers and we tested the number of amps and how much voltage the battery had. As a test, we needed to set up a circuit that made a flashy light. When that was done, we moved into arduino. With the arduino toolkit, we began to learn more about coding and how to use that coding to produce different things. We made flashy lights, made it take temperature, play music, and display words on a LCD. As our end goal, we had to make something cool and creative using the code and make it work. Me and my teammate made The breadboard play Indiana Jones, Raiders March. and have Indiana Jones display on the LCD. Here is a video of our robot.
Here is the code that we used for our project.
/*Indiana Jones
The buzzer in the Inventor's Kit is an electromechanical
component you can use to make noise. Inside the buzzer is a
coil of wire and a small magnet. When current flows through
the coil, it becomes magnetized and pulls towards the magnet,
creating a tiny "click". When you do this thousands of times
per second, you create tones.
The Arduino has a built-in command called tone() which clicks
the buzzer at a certain frequency. This sketch knows the
frequencies of the common notes, allowing you to create songs.
We're never going to let you down!
Hardware connections:
The buzzer has two pins. One is positive and one is negative.
The postitive pin is marked by a "+" symbol on both the top
and bottom of the buzzer.
Connect the positive pin to Arduino digital pin 9.
(Note that this must be a PWM pin.)
Connect the negative pin to GND.
Tip: if the buzzer doesn't fit into the breadboard easily,
try rotating it slightly to fit into diagonal holes.
This sketch was written by SparkFun Electronics,
with lots of help from the Arduino community.
(This sketch was originally developed by D. Cuartielles for K3)
This code is completely free for any use.
Visit http://learn.sparkfun.com/products/2 for SIK information.
Visit http://www.arduino.cc to learn about the Arduino.
Version 2.0 6/2012 MDG
*/
/*
This sketch uses the buzzer to play songs.
The Arduino's tone() command will play notes of a given frequency.
We'll provide a function that takes in note characters (a-g),
and returns the corresponding frequency from this table:
note frequency
c 262 Hz
d 294 Hz
e 330 Hz
f 349 Hz
g 392 Hz
a 440 Hz
b 494 Hz
C 523 Hz
*/
const int buzzerPin = 9;
// We'll set up an array with the notes we want to play
// change these values to make different songs!
// Length must equal the total number of notes and spaces
const int songLength = 39;
// Notes is an array of text characters corresponding to the notes
// in your song. A space represents a rest (no tone)
char notes[] = " efgCdefgabFabCDEefgCDEFggEDgEDgEDgED "; // a space represents a rest
// Beats is an array of values for each note and rest.
// A "1" represents a quarter-note, 2 a half-note, etc.
// Don't forget that the rests (spaces) need a length as well.
int beats[] = {1,3,1,2,11,3,1,11,3,1,2,10,3,1,4,4,4,3,1,2,11,3,1,11,3,1,4,3,1,4,3,1,4,3,1,2,1};
// The tempo is how fast to play the song.
// To make the song play faster, decrease this value.
int tempo = 130;
#include <LiquidCrystal.h>
LiquidCrystal lcd(12,11,5,4,3,2);
void setup()
{
pinMode(buzzerPin, OUTPUT);
lcd.begin(16, 2);
lcd.clear();
lcd.print("Indiana Jones");
}
void loop()
{
int i, duration;
for (i = 0; i < songLength; i++) // step through the song arrays
{
duration = beats[i] * tempo; // length of note/rest in ms
if (notes[i] == ' ') // is this a rest?
{
delay(duration); // then pause for a moment
}
else // otherwise, play the note
{
tone(buzzerPin, frequency(notes[i]), duration);
delay(duration); // wait for tone to finish
}
delay(tempo/10); // brief pause between notes
}
// We only want to play the song once, so we'll pause forever:
while(true){}
// If you'd like your song to play over and over,
// remove the above statement
}
int frequency(char note)
{
// This function takes a note character (a-g), and returns the
// corresponding frequency in Hz for the tone() function.
int i;
const int numNotes = 11; // number of notes we're storing
// The following arrays hold the note characters and their
// corresponding frequencies. The last "C" note is uppercase
// to separate it from the first lowercase "c". If you want to
// add more notes, you'll need to use unique characters.
// For the "char" (character) type, we put single characters
// in single quotes.
char names[] = { 'c', 'd', 'e', 'f', 'g', 'a', 'b', 'C','D','E','F' };
int frequencies[] = {262, 294, 330, 349, 392, 440, 494, 523, 587, 659, 698};
// Now we'll search through the letters in the array, and if
// we find it, we'll return the frequency for that note.
for (i = 0; i < numNotes; i++) // Step through the notes
{
if (names[i] == note) // Is this the one?
{
return(frequencies[i]); // Yes! Return the frequency
}
}
return(0); // We looked through everything and didn't find it,
// but we still need to return a value, so return 0.
}
reflection: This project was a very good one. Me and my partner got a lot done and learned a lot of cool things. The two things I improved were work ethic and productivity and empathy. I made sure to stay on task and also listen to other peoples ideas. What I need to work on is my leadership. I kind of let my partner take charge instead of doing it myself. I also needed to do more research outside of class to work on the project.